Quick & Easy Installation
Installation Video Guide


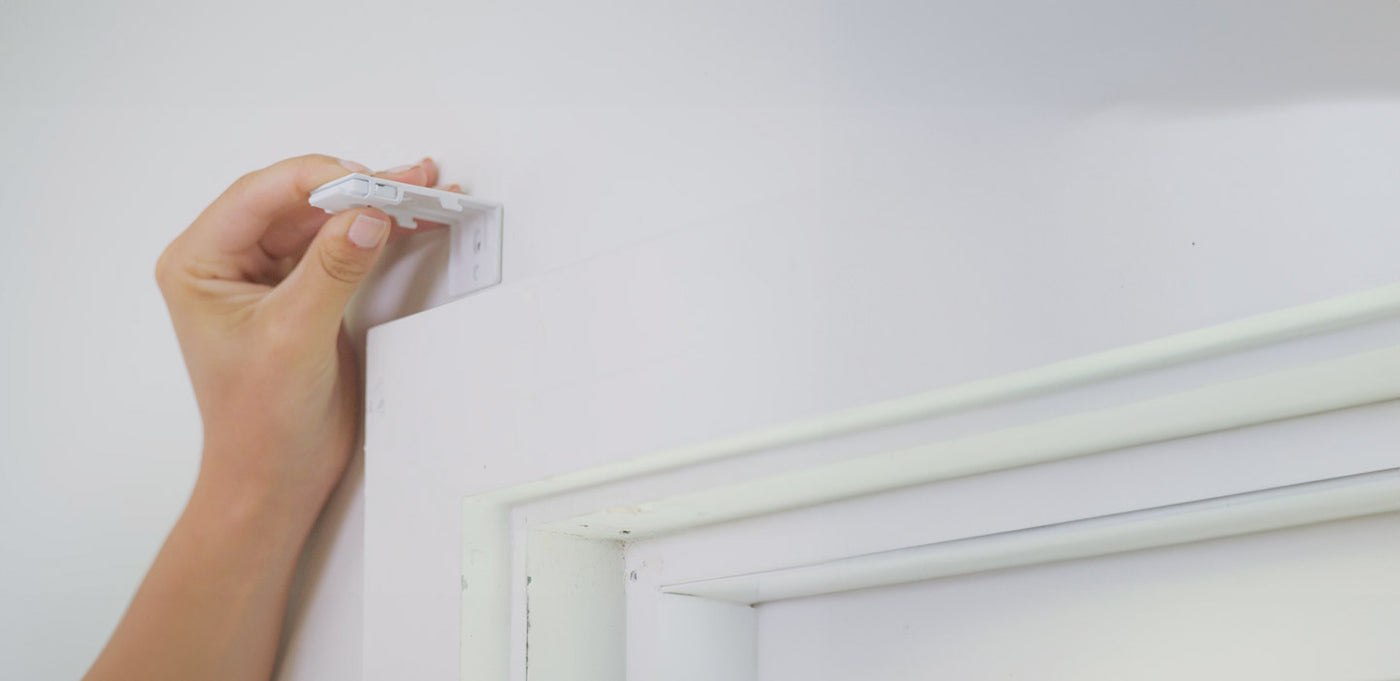
Positioning Your Brackets
STEP 1 - Position the first bracket in the upper corner of the window frame so that it's level with the wall's surface. Always check your specific product instructions for the exact placement of the brackets.
STEP 2 - Mark the screw locations with a pencil.
STEP 3 - Repeat steps 1 and 2 with the second bracket in the opposite corner of the window frame. If you're mounting into drywall with no studs behind, you will need to use drywall anchors.
STEP 4 - Use a level tool to ensure the two bracket locations are even before proceeding to STEP 5.

Installing the Brackets
STEP 5 - Choose a drill bit that's smaller than your screws. Drill pilot holes through your bracket marks.
STEP 6 - Screw the brackets into place.

Mounting the Headrail
STEP 7 - Position the headrail with the front panel resting
on the top lip of the brackets. Push the bottom front of the headrail firmly backwards and toward the window until the lip on the rear of the headrail engages the bracket and snaps into place.
Need To Install Outdoor Shades?
Installation by Collection

Roller Shades
Step 1: Mark Bracket Positions
Attach brackets temporarily to the shade. Mark screw locations on the wall or ceiling with a level. For inside mount, use top or side as needed (keep 4” from each end).
Step 2: Secure Brackets
Drill pilot holes and screw brackets firmly into place.
Step 3: Install the Shade
Align the shade and push gently until both sides click securely.
Test with app or remote. You're done!

Cellular Shades
Step 1: Mark Bracket Positions
Attach brackets temporarily to the shade headrail. Hold in position and mark screw holes with a level.
Step 2: Secure Brackets
Drill pilot holes and screw brackets firmly into place.
Step 3: Install the Shade
Align the shade and push gently until both sides click securely.
Step 4: Battery Setup
Clip and insert the battery stick, then connect it to the motor.
Test with app or remote. You're done!

Zebra Shades
Step 1: Mark Bracket Positions
Attach brackets temporarily to the shade. Hold in position and mark screw holes on the wall or ceiling with a level (keep 4” from each end).
Step 2: Secure Brackets
Drill pilot holes and screw brackets firmly into place.
Step 3: Install the Shade
Align the shade with the brackets and push gently until both sides click securely.
Test with app or remote. You're done!

Woven Wood Shades
Step 1: Mark Bracket Positions
Temporarily attach brackets to the shade headrail. Hold in position and mark screw holes with a level.
Step 2: Secure Brackets
Drill pilot holes and screw brackets firmly into wall or ceiling.
Step 3: Install the Shade
Hold the shade, thread bracket screws through headrail slots, then tighten wing nuts securely by hand.
Test with app or remote. You're done!

Dual Shades
Step 1: Mark Bracket Positions
Temporarily attach brackets and valance brackets to the shade. Mark screw holes on ceiling or wall with a level (keep 6" from each end).
Step 2: Secure Brackets
Drill pilot holes and screw all brackets firmly into place.
Step 3: Install the Shade
Align the shade with the brackets and push gently until both sides click securely.
Step 4: Attach Valance
Align and click the valance firmly into place on both sides.
Test with app or remote. You're done!

Drapery & Curtain
Step 1: Prepare the Track
If your track is longer than 2500mm, splice the sections using the overlap arm and belt buckle. Remove any excess runners and insert fabric hooks into the carriers (this must be done before mounting the track).
Step 2: Mount the Track
Secure fixed brackets (and extension brackets for wall mount) to ceiling or wall at proper spacing. Snap the track firmly into place.
Step 3: Install Motor
Insert the motor into the end of the track and lock it securely.
Step 4: Install Valance (if purchased)
Attach valance fixed brackets and click the valance into position.
Step 5: Hang the Drapery
Match fabric hooks to the track runners and hang your curtains. Adjust hooks up or down for perfect pleats.
Test with app or remote. You're done!

Roman Shades
Step 1: Mark Bracket Positions
Attach brackets to the headrail. Hold in position and mark screw holes on the wall or ceiling with a level.
Step 2: Secure Brackets
Drill pilot holes and screw brackets firmly into place.
Step 3: Install the Shade
Align the shade with the brackets and push gently until both sides click securely.
Test with app or remote. You're done!
Solar Shades
Step 1: Mark Bracket Positions
Attach brackets temporarily to the shade. Mark screw locations on the wall or ceiling with a level. For inside mount, use top or side as needed (keep 4” from each end).
Step 2: Secure Brackets
Drill pilot holes and screw brackets firmly into place.
Step 3: Install the Shade
Align the shade and push gently until both sides click securely.
Test with app or remote. You're done!

Skylight Shades
Step 1: Assemble the Frame
Position top, bottom, left, and right rails according to stickers. Insert side rail tabs into fabric slots (rail tabs into rail slots, fabric tabs into fabric slots). Attach top and bottom rails, then secure all four corners with assembly screws.
Step 2: Mount the Shade
- Inside Mount: Position shade and secure side rails with screws.
- Outside Mount: Remove cover plates and screw into mounting blocks.
Step 3: Quick Start & Test
Wake motor from sleep mode, pair remote, set limits, and test smooth operation. Route charging cable properly before final mounting.
Test with app or remote. You're done!

Outdoor Shades
Step 1: Mount Valance Brackets
Mark positions with double-sided stickers (2–4" from edges). Drill holes and securely install brackets on wall or ceiling using anchors and screws.
Step 2: Hang the Shade
Align valance onto bracket hooks and push plastic tabs until they click firmly into place.
Step 3: Install Guide Wires
Screw guide wire into valance, lower shade fully, mount lower brackets, thread and tension cable securely, then trim excess.
Test with app or remote. You're done!
Important tips
I'm missing hardware from my order. What should I do?
I'm missing hardware from my order. What should I do?
Please contact us and let us know. We'll rectify the situation for you.
What tools do I need for this installation?
What tools do I need for this installation?
You will need: Steel Measuring Tape, Pencil, Step Ladders if necessary, Screwdriver Drill or Power Drill (with 1/4” hex driver and drill bit),
Is measurement the same for Inside mount and outside mount?
Is measurement the same for Inside mount and outside mount?
No, be sure to double check and make sure you're accounting for which type of mount you are installing.